Appearance
Adding or Removing Users
Create a new user
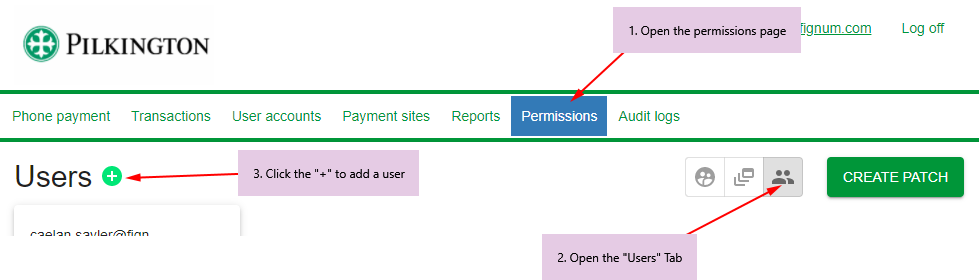
- Navigate to "Permissions" page on the menu bar
- Select the "Users" icon
- Click the green "+" icon
Now supply the details of the new user. You must supply a valid email and name. The "Phone System User" field can be ignored.
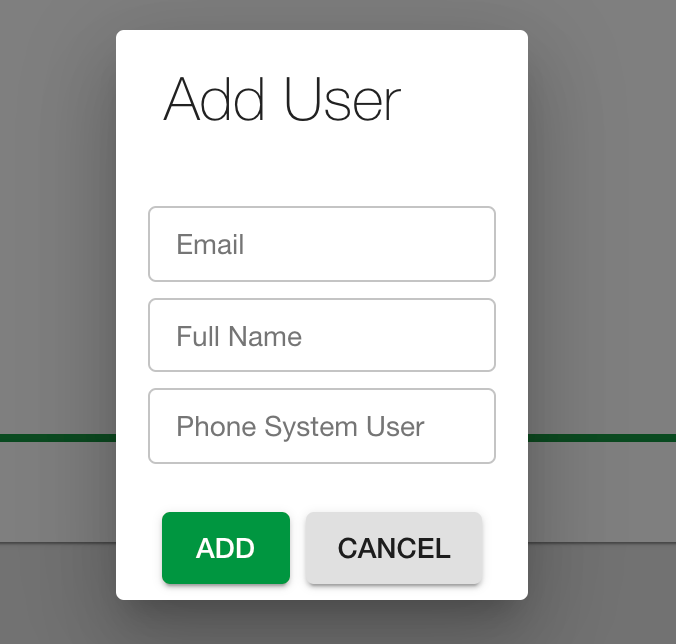
Important
The new user will appear in the user list once you click "Add" but they will not actually be created until you create a patch. See below in "Create a Patch" for more information.
Add the newly created user to a team
After the user is created, you may modify their permissions by adding them to a team. See Modifying User Permissions for more information.
Create a Patch
All user/permission changes are submitted as patches. This allows you to create many users or modify permissions for several users, review those changes, and apply them all in one operation.
Once you have created a user and optionally added them to a team, you must click the green "Create Patch" button in the top right. You will then be given a chance to review the pending changes.
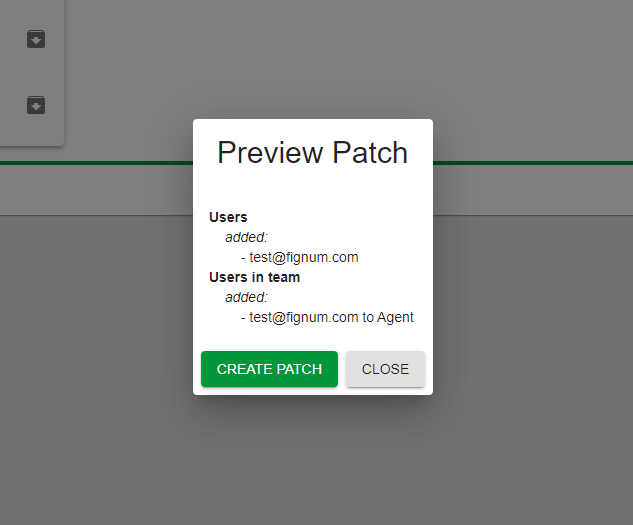
If you are happy when the changes that will be applied, click "Create Patch" again in this dialog to confirm.
Password Setup Required
Newly created users will not receive a notification that a new account has been created. They must reset their password to verify their email address and set their first password. See Resetting Your Password for more information.
Disabling / re-activating existing users
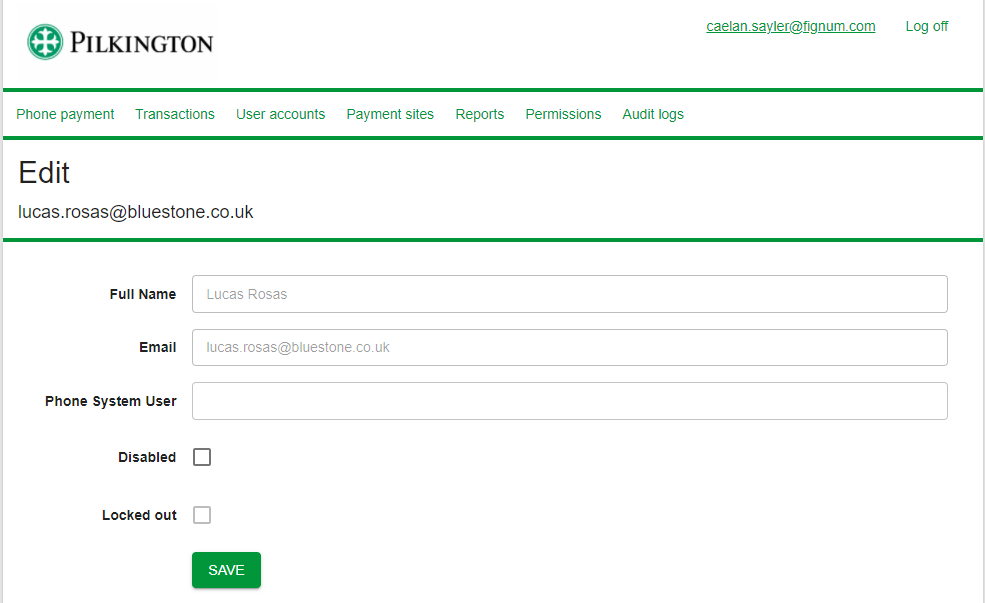
User accounts can be disabled manually, or they will be disabled automatically if they have not signed in within 90 days. To disable or re-activate a user, navigate to "User Accounts" on the menu bar. A user can also become locked out if they have tried to use the incorrect password.
Navigate to the User Accounts page, and search for and open the user you would like to edit.
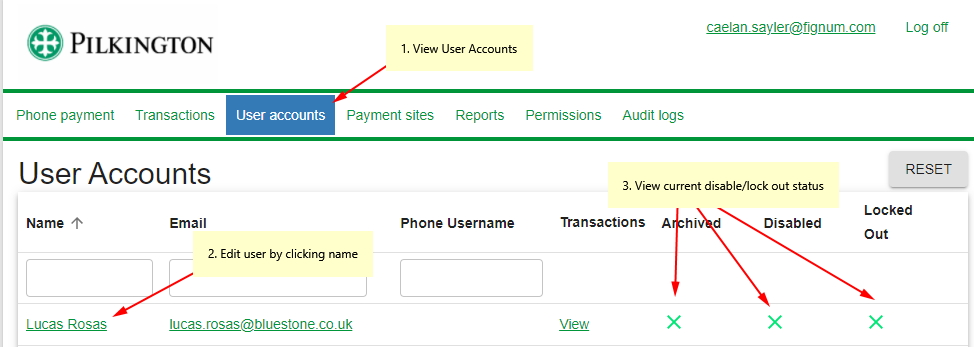
Check or uncheck the "Disabled" or "Locked out" box to disable or re-instate the user.
Also visit Modifying User Permissions for more information on how to edit user permissions / capabilities.